We know hindsight is a wonderful thing, but without a time machine, there’s little we can do to change the past. But we can learn from other people and their experiences. If you’re starting your career as a Wind Technician, you know how invaluable it is to learn from experienced professionals.
So, with that in mind, we spoke to our amazing GWO course instructors and asked them, what do you wish you’d known in those early days as a wind tech?
No.1 – What are the proper LOTO procedures and what do really good LOTO procedures look like?
Lockout/Tagout (LOTO) procedures are critical for ensuring the safety of workers performing maintenance or servicing on machinery and equipment. Proper LOTO procedures prevent the unexpected energization or startup of machinery, as well as the release of stored energy, which could cause injuries. Here are the key steps and components of a good LOTO procedure:
Key Steps in LOTO Procedures
Preparation for Shutdown
- Notify affected employees: Inform all affected employees that a lockout/tagout procedure is about to begin.
- Identify energy sources: Determine all sources of energy for the equipment (electrical, mechanical, hydraulic, pneumatic, etc.).
Shutdown
- Turn off the equipment: Use normal shutdown procedures to turn off the machine or equipment.
Isolation
- Isolate the equipment from its energy source: Physically disconnect the equipment from energy sources. This might involve turning off circuit breakers, closing valves, or disconnecting power sources.
Lockout/Tagout Application
- Apply locks and tags: Place lockout devices on energy-isolating devices (such as switches, valves, etc.) and apply tags indicating that the equipment is being serviced and should not be operated. Each worker should apply their own lock and tag to ensure personal protection.
Release of Stored Energy
- Release or restrain stored energy: Ensure that any stored energy (e.g., in springs, elevated machine parts, capacitors, etc.) is released, drained, or otherwise made safe.
Verification of Isolation
- Verify that the equipment is isolated: Before beginning any maintenance or servicing, confirm that the equipment is properly isolated and cannot be energized. This might involve trying to start the equipment and ensuring it does not activate.
Restoring Equipment to Service
Inspect the Work Area
- Ensure the area is clear: Verify that all tools and materials are removed and that the machine or equipment is in a safe condition for re-energization.
Remove Lockout/Tagout Devices
- Remove locks and tags: Each person who applied a lock and tag must remove their own lock and tag. Follow an established protocol for the safe removal of these devices.
Re-energize the Equipment
- Restore energy: Reconnect the equipment to its energy source(s) and ensure it is functioning properly.
Notify Affected Employees
- Inform affected employees: Let all affected employees know that the maintenance or servicing is complete and that the equipment is back in service.
Components of a Good LOTO Procedure
Detailed Written Procedures
- Specific steps: Clearly document all the steps for shutting down, isolating, locking, and tagging out equipment.
- Tailored procedures: Ensure procedures are specific to each type of equipment or machinery.
Training and Communication
- Training programs: Provide comprehensive training to all employees on LOTO procedures, emphasizing the importance of following each step.
- Communication: Regularly communicate the importance of LOTO procedures and provide updates or refresher training as needed.
Proper Equipment and Tools
- Locks and tags: Ensure there are enough lockout devices and tags available, and that they are suitable for the types of energy sources present.
- Isolation devices: Provide additional equipment needed to isolate energy sources, such as valve covers or circuit breaker lockout devices.
Regular Audits and Inspections
- Periodic inspections: Conduct regular inspections of LOTO procedures to ensure compliance and identify areas for improvement.
- Audit trails: Keep records of all lockout/tagout activities, including the personnel involved and the equipment serviced.
Accountability and Responsibility
- Designate responsibilities: Clearly assign responsibility for each part of the LOTO procedure to specific individuals.
- Employee involvement: Engage employees in the development and improvement of LOTO procedures to ensure buy-in and adherence.
By following these steps and components, organizations can create robust LOTO procedures that protect workers and ensure a safe working environment.
No.2 – What are the differences between AR and FR clothing?
AR (Arc Rated) and FR (Flame Resistant or Flame Retardant) clothing are both designed to protect workers from hazardous environments involving heat, flames, or electrical arcs. However, there are key differences between these types of protective clothing.
1. Purpose and Protection
2. Standards and Testing
FR Clothing
- Standards: Common standards include NFPA 2112 (Standard on Flame-Resistant Garments for Protection of Industrial Personnel Against Flash Fire) and ASTM F1506 (Standard Performance Specification for Flame Resistant Textile Materials for Wearing Apparel for Use by Electrical Workers Exposed to Momentary Electric Arc and Related Thermal Hazards).
- Testing: FR clothing is tested for its ability to resist ignition, its self-extinguishing properties, and its thermal insulation capabilities.
AR Clothing
- Standards: Key standards include ASTM F1959/F1959M (Standard Test Method for Determining the Arc Rating of Materials for Clothing) and NFPA 70E (Standard for Electrical Safety in the Workplace).
- Testing: AR clothing undergoes arc flash testing to determine its Arc Thermal Performance Value (ATPV) or Energy Breakopen Threshold (EBT). These ratings indicate the level of protection the clothing provides against arc flash incidents.
3. Labeling and Ratings
FR Clothing
- Labeling: Labels typically indicate compliance with relevant standards (e.g., NFPA 2112) and may provide information on the garment’s flame resistance properties.
- Ratings: FR clothing does not have an arc rating because it is not specifically tested for arc flash protection.
AR Clothing
- Labeling: Labels indicate compliance with arc flash protection standards and include the ATPV or EBT rating, which measures the level of protection against arc flash incidents.
- Ratings: AR clothing must have an arc rating, which quantifies its ability to protect against the thermal energy from an arc flash.
4. Material and Design
FR Clothing
- Material: Made from fabrics that are inherently flame resistant or treated to resist flames. Common materials include Nomex, Kevlar, and treated cotton.
- Design: Designed to minimize ignition sources and often includes features like non-melting zippers, flame-resistant threads, and reinforced seams.
AR Clothing
- Material: Made from materials that provide both flame resistance and arc flash protection. These materials can include blends of FR fabrics with additional properties for arc resistance.
- Design: Incorporates features to enhance protection against arc flash, such as multiple layers, reinforced areas, and designs that minimize the risk of arc flash exposure.
Summary
- FR Clothing: Protects against flames and thermal hazards. Commonly used in industries with fire risks. Labeled with flame resistance standards.
- AR Clothing: Protects against arc flash incidents and includes an arc rating (ATPV or EBT). Primarily used in electrical industries. Labeled with arc flash protection standards.
Choosing the appropriate type of protective clothing depends on the specific hazards present in the work environment. For environments with both fire and electrical arc flash risks, AR clothing that meets both flame resistance and arc flash protection standards may be necessary.
No.3 – What are some of the common high voltage hazards wind techs face?
High voltage hazards in wind turbines pose significant risks to workers, and understanding these hazards is essential for ensuring safety. Here are some common high voltage hazards encountered in wind turbines:
1. Arc Flash
- Description: An arc flash occurs when an electrical current passes through the air between conductors, generating intense heat and light. This can cause severe burns, eye damage, and even fatalities.
- Risks: Arc flashes can occur during maintenance or repair operations, particularly when working on electrical panels, switchgear, or other high-voltage components.
2. Electrical Shock
- Description: Electrical shock occurs when a person comes into contact with a live electrical component, resulting in the passage of electrical current through the body.
- Risks: Shock hazards are present when working on or near live electrical equipment, including transformers, inverters, and cabling within the turbine.
3. Stored Energy
- Description: High-voltage systems can store significant amounts of electrical energy in capacitors and other components, even when the system is shut down.
- Risks: Unexpected release of stored energy can cause shocks or arc flashes. Proper procedures must be followed to discharge stored energy before working on the equipment.
4. Insulation Failure
- Description: Insulation in high-voltage components can degrade over time due to environmental factors, mechanical wear, or electrical stresses.
- Risks: Insulation failure can lead to short circuits, ground faults, and unintentional energization of conductive parts, posing shock and fire hazards.
5. Switching Operations
- Description: Operations involving the switching of high-voltage circuits, such as connecting or disconnecting components, can generate electrical arcs.
- Risks: Improper switching procedures can result in arc flash incidents or damage to equipment, creating hazardous conditions.
6. Lightning Strikes
- Description: Wind turbines are tall structures often located in exposed areas, making them susceptible to lightning strikes.
- Risks: Lightning can cause direct damage to electrical components and induce high-voltage surges, leading to arc flashes and equipment failure.
7. Faulty Grounding
- Description: Proper grounding is essential to ensure electrical safety by providing a path for fault currents. Faulty or inadequate grounding can pose serious risks.
- Risks: Improper grounding can lead to elevated voltages in unintended parts of the system, increasing the risk of electrical shock and equipment damage.
8. Human Error
- Description: Mistakes made by personnel during installation, maintenance, or repair of high-voltage systems can create hazardous conditions.
- Risks: Incorrect procedures, failure to follow safety protocols, or lack of proper training can result in exposure to live parts, leading to shocks or arc flashes.
9. Component Failure
- Description: High-voltage components, such as transformers, converters, and circuit breakers, can fail due to manufacturing defects, aging, or excessive loads.
- Risks: Component failures can lead to electrical faults, fires, and other hazardous situations.
10. Environmental Conditions
- Description: Harsh environmental conditions, such as extreme temperatures, humidity, and saltwater exposure, can affect the integrity of high-voltage components.
- Risks: Environmental degradation can lead to insulation breakdown, corrosion of electrical connections, and increased likelihood of electrical faults.
Safety Measures
To mitigate these hazards, the following safety measures are typically implemented:
- Training and Certification: Ensuring all personnel are properly trained and certified in high-voltage safety procedures.
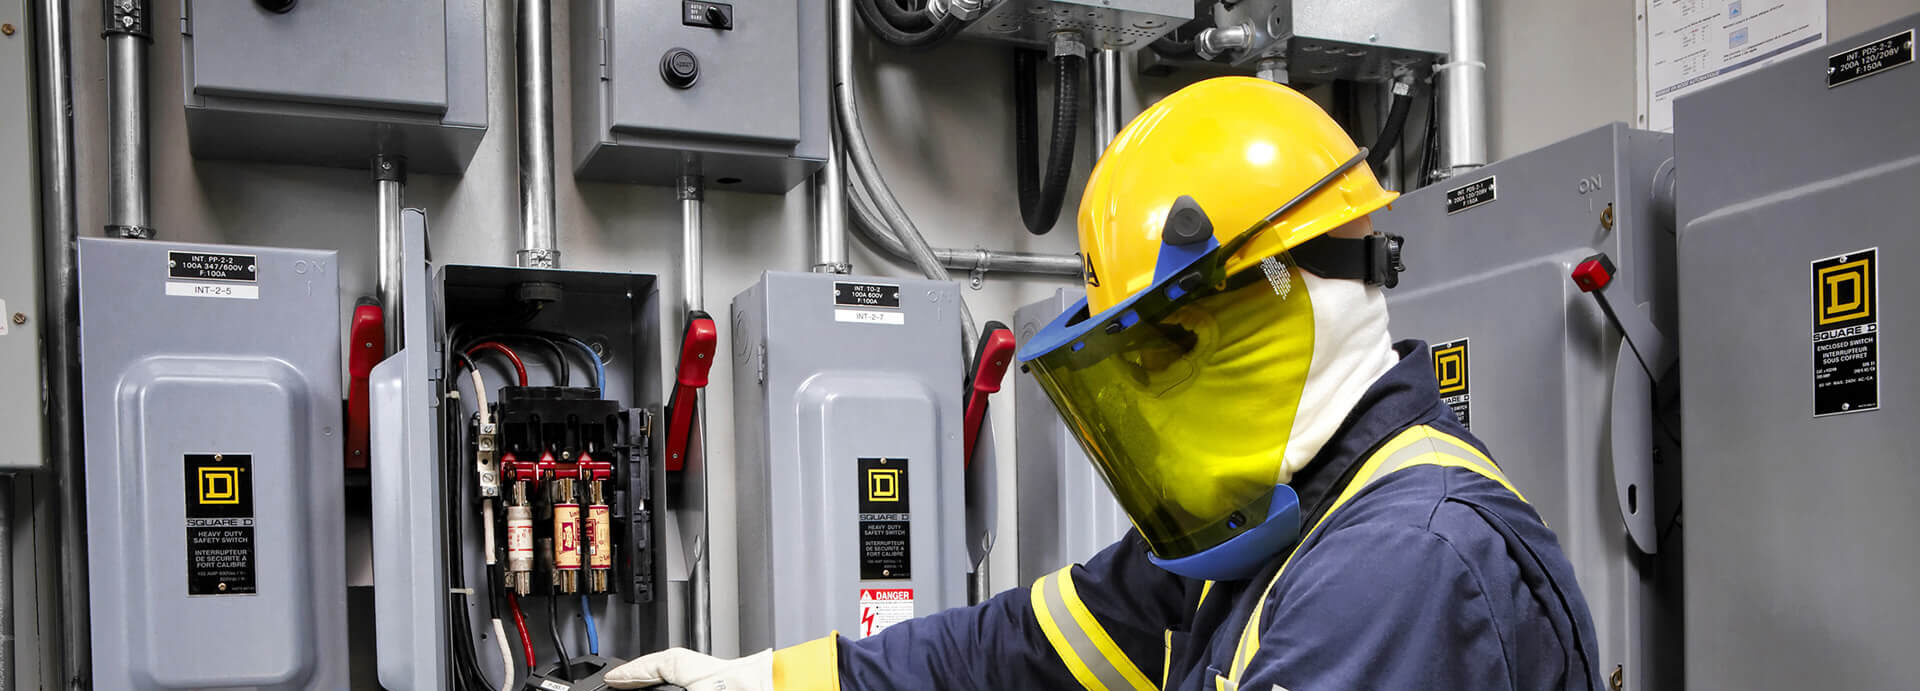
- Personal Protective Equipment (PPE): Using appropriate PPE, such as insulated gloves, arc flash suits, and face shields.
- Lockout/Tagout (LOTO) Procedures: Implementing strict LOTO procedures to ensure equipment is de-energized and cannot be accidentally re-energized during maintenance.
- Regular Inspections and Maintenance: Conducting regular inspections and maintenance of high-voltage components to identify and address potential issues.
- Proper Grounding and Bonding: Ensuring all components are correctly grounded and bonded to prevent electrical shocks.
- Use of Insulated Tools: Utilizing insulated tools to prevent accidental contact with live parts.
- Environmental Controls: Protecting electrical components from environmental damage through proper enclosures and environmental controls.
By understanding and addressing these high voltage hazards, the safety of workers in and around wind turbines can be significantly improved.
No.4 – How to read electrical and hydraulic schemtics
Reading schematics for wind turbines, whether electrical or hydraulic, requires understanding the symbols, layout, and conventions used in these diagrams. Here’s a guide to help you interpret these schematics effectively:
Understanding Electrical Schematics
Basic Components and Symbols
- Lines: Represent wires or conductors. Solid lines are typically for power circuits, and dashed or dotted lines indicate control circuits.
- Switches: Various types of switches (manual, limit, relay contacts) are depicted with different symbols.
- Resistors, Capacitors, Inductors: Each has a unique symbol, often standardized by organizations like IEC or ANSI.
- Transformers: Usually shown with two coils and a magnetic core, indicating voltage step-up or step-down.
- Motors: Represented with a circle and the letter “M”.
- Diodes and Transistors: Use specific symbols that indicate the direction of current flow and the type of semiconductor device.
Reading the Layout
- Power Flow: Follow the flow of power from the source (e.g., generator) through transformers, converters, and distribution panels to various loads (motors, lighting, control systems).
- Control Circuits: Trace control signals from switches and sensors to relays, contactors, and controllers.
Common Wind Turbine Electrical Components
- Generator: Converts mechanical energy from the rotor into electrical energy.
- Converters/Inverters: Convert AC to DC (rectifiers) or DC to AC (inverters) for grid compatibility.
- Transformers: Step up the voltage for transmission or step it down for distribution within the turbine.
Example Symbols
- Generator: A circle with an embedded “G”.
- Transformer: Two inductive coils with lines between them.
- Circuit Breaker: A switch symbol with a break in the line.
Basic Components and Symbols
- Pumps: Typically depicted with a circle and a triangle pointing outward (indicating flow direction).
- Valves: Different types (check valves, directional control valves, pressure relief valves) have specific symbols that show their function and flow paths.
- Actuators: Cylinders and motors are shown with symbols indicating linear or rotary motion.
- Reservoirs: Depicted as a rectangle with a line across the top, representing the fluid level.
Reading the Layout
- Flow Paths: Trace the flow of hydraulic fluid from the reservoir through the pump, valves, actuators, and back to the reservoir.
- Control Lines: Identify pilot lines that control valve positions, often represented with dashed lines.
Common Wind Turbine Hydraulic Components
- Pitch Control System: Uses hydraulic actuators to adjust the angle of the blades.
- Brake System: Employs hydraulic pressure to apply brakes for stopping the rotor.
Example Symbols
- Hydraulic Pump: A circle with a triangle pointing outward.
- Directional Control Valve: A box with arrows indicating the flow direction, often showing multiple positions.
- Cylinder: A rectangle with lines indicating the piston and rod.
Tips for Reading Schematics
- Start with the Legend: Always begin by reviewing the legend or key, which explains the symbols used in the schematic.
- Follow the Flow: Identify the source of power or fluid and follow the path through various components to understand the system’s operation.
- Look for Labels: Components are often labeled with reference designators (e.g., R1 for resistor, Q1 for transistor) and sometimes with descriptive names.
- Refer to Standards: Familiarize yourself with standards like IEC, ANSI, or ISO, which provide guidelines for schematic symbols and layout.
- Practice with Examples: Study sample schematics and try to identify and trace different circuits or hydraulic paths.
Resources for Learning
- Standards Organizations: Documents from IEC, ANSI, and ISO.
- Textbooks and Manuals: Books on electrical and hydraulic systems, specifically for wind turbines or industrial applications.
- Online Tutorials: Websites and videos that offer step-by-step guides to reading schematics.
By understanding these basic principles and symbols, you’ll be able to read and interpret wind turbine electrical and hydraulic schematics more effectively.
No.5 – What are all the different parts that make up a wind turbine?
A wind turbine consists of several key components that work together to convert wind energy into electrical energy. Here are the main parts of a wind turbine and their functions:
1. Rotor Blades
- Function: Capture the kinetic energy of the wind.
- Description: Usually, wind turbines have three rotor blades that are aerodynamically designed to maximize efficiency.
2. Hub
- Function: Connects the rotor blades to the nacelle.
- Description: The central part where the blades are attached. It is connected to the main shaft.
3. Nacelle
- Function: Houses most of the turbine’s key components.
- Description: Located at the top of the tower, the nacelle contains the gearbox, generator, controller, and other essential parts.
4. Main Shaft (Low-Speed Shaft)
- Function: Transfers mechanical energy from the rotor blades to the gearbox.
- Description: Connects the hub to the gearbox and rotates at the same speed as the blades.
5. Gearbox
- Function: Increases the rotational speed from the main shaft to the generator.
- Description: Converts the slow rotational speed of the rotor (typically 10-60 RPM) to a higher speed (typically 1000-1800 RPM) suitable for generating electricity.
6. Generator
- Function: Converts mechanical energy into electrical energy.
- Description: Often an induction or synchronous generator that produces electricity when rotated.
7. Controller
- Function: Monitors and controls the operation of the turbine.
- Description: Ensures the turbine operates efficiently and safely, adjusting the pitch of the blades and the yaw of the nacelle as needed.
8. Brake System
- Function: Stops the rotor in emergencies or during maintenance.
- Description: Mechanical, electrical, or hydraulic brakes can be used to stop the rotor from spinning.
9. Yaw System
- Function: Rotates the nacelle to face the wind direction.
- Description: Ensures the turbine is aligned with the wind to maximize energy capture. It includes a yaw motor and a yaw bearing.
10. Pitch System
- Function: Adjusts the angle of the rotor blades.
- Description: Changes the pitch of the blades to control rotational speed and optimize power generation.
11. Tower
- Function: Supports the nacelle and rotor blades.
- Description: Usually made of steel or concrete, the tower elevates the rotor blades to a height where they can capture more wind energy.
12. Anemometer and Wind Vane
- Function: Measure wind speed and direction.
- Description: Mounted on the nacelle, these instruments provide data to the controller to adjust the yaw and pitch systems.
13. Transformer
- Function: Steps up the voltage of the generated electricity for transmission.
- Description: Converts the generator’s output voltage to a higher voltage suitable for transmission over power lines.
14. Foundation
- Function: Anchors the turbine to the ground.
- Description: Made of concrete and steel, the foundation provides stability and support for the entire structure.
15. Cooling System
- Function: Keeps the generator and other components at a safe operating temperature.
- Description: Uses air or liquid cooling methods to dissipate heat generated during operation.
Understanding these parts and their functions is essential for the design, operation, and maintenance of wind turbines.
As you can see, learning from those with high-quality, real-life experience can be a huge benefit at any stage of your wind technician career, especially if you’re just starting out. That’s why at STL USA, we value training the whole wind tech, throughout the lifespan of their career, rather than solely focusing on certification and classroom training.
If you’d like to know more about the wide range of training STL USA offers, above and beyond standard GWO certification courses, drop us a message today by clicking the button below.